Friday, September 30, 2022

Enhancing legacy ERP systems with Microsoft Power Platform

On-premise ERP Systems have been the default system of record for the past 30+ years. They are the legacy systems used by millions of business globally which are running strong but lack modern technology. Organizations can find it difficult to improve their business processes and user experience without upgrading or moving the systems to a new cloud-based ERP application like Microsoft Dynamics 365. Organizations may also have challenges finding the necessary talent to incorporate complex AI / ML with their existing on-premise legacy apps. 

One option is to use Microsoft Power Platform to enhance the legacy ERP experience. Microsoft Power Platform is a low code application platform (LCAP) that provides multiple components (refer below figure) to use with existing system of records and add new technological capabilities. This blog discusses some of the business process automation that can be enabled by Microsoft Power Platform.


      #1 - Order to invoice process – Consider the scenario of a order to invoice business process. Typically, a customer sales order is received from website or email as an attachment and entered into the CRM or ERP system. This leads to the user creating a purchase order in the legacy ERP system to procure materials or products from the supplier. Supplier processes the PO and ships the products to the Customer (drop ship). Supplier sends packing slip and invoice to the business.  The business user invoices the customer. In a legacy ERP system, this can be a very manual, error prone and time-consuming process as the volume of orders increases.  


Order to Invoice process

This process can be automated and here are some scenarios where Microsoft Power Platform can be used along with the legacy ERP application.

  1. Automate Order Entry – Using Power Automate the entering of the order from email or as an attachment can be enabled. Power Automate cloud flow can trigger AI builder to scan and read the email attachment and capture the items that are ordered by the Customer. The cloud flow can trigger a Power Automate Desktop flow to enter the ordered items in the Legacy ERP system.
  2. Automate Vendor Invoice entry – As above the Power Automate can also be used to automate the vendor invoice entry into the legacy ERP system.
  3. Email to Customer – Power Automate can be used to trigger an order delivery email to the Customer when a Packing Slip is received from the Vendor.

There are many such use cases that can be automated using Microsoft Power Platform. An example of utilizing Microsoft Power Platform along with SAP CRM and SAP ERP applications is also shown below.


In this example Azure Data Factory is used to get data from SAP CRM and into Azure SQL. Then Power Automate flow and AI Builder is triggered to complete the automation.

Some other examples of using Microsoft Power Platform are also discussed below. 

#2 - Customer Chat-bot - Power Virtual Agent can be used on the Portal to answer queries from Customer. Customer goes to the Portal and want to know the status of the order. Power Virtual Agent can be enabled to trigger a Power Automate Flow to query the database and get status of the order and provide the information to the Customer. The Chat-bot capability can also be enabled to assist in answering queries on product inventory and pricing.

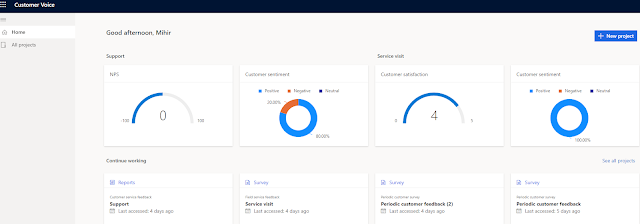
#3 - Gain business insights – Power BI can be used to develop visuals and dashboards to gain insights from business data. Power BI can connect to legacy on-premise systems using the data gateway. Power BI Desktop can be used to develop powerful visuals dashboards. Power BI can help empower business users to work with the data, model complex business scenarios and get insights they need to take actions and business decisions.   

Microsoft Power Platform as a low code app platform can help to empower your employees to do more with your existing legacy applications. Hope this makes you to try one of the Power Platform products. Do let me know about your experience using Microsoft Power Platform with your existing legacy applications.

Thanks for reading.

365WithoutCode     

@mihircrm


Thursday, August 18, 2022

Microsoft Dynamics 365 Omnichannel for Customer Service – Part-1 – Unified Routing

I have worked on many enterprise projects that requires an engine to intelligently route work related records to their destination. This is especially true for Customer Service where in the incoming work must be routed to Agents. The understanding and design of Work routing is crucial for the ability of the organization to scale as the workload increases due to addition of new work items / customers and service transactions. 
 Now in the world of Omnichannel the work item can be part of any channel – for example SMS Text, Voice, Whatsapp, Chat or Email. There are more complex rules for Routing the right work item to the right Agent without delays. Workers need to be skilled to perform the work and they could be specialized in only certain type of work. Additionally, the Customer Service systems has to support multiple languages too. 

Thankfully we have the Unified Routing engine in Microsoft Dynamics 365 Omnichannel for Customer Service that can help us in configuring most of the business rules. This blog introduces some of the benefits of implementing Unified Routing in Microsoft Dynamics 365 Omnichannel for Customer Service. 

What is Unified Routing? 

 As per Microsoft – “Unified routing is an intelligent, scalable, and enterprise-grade routing and assignment capability. It can direct the incoming work item to the best-suited queue and agent by adhering to work item requirements and matching them with the agent's capabilities.” Unified Routing in Microsoft Dynamics 365 Omnichannel for Customer Service works as shown in the following figure.

Unified Routing - Omnichannel for Customer Service

The following is a brief overview of the Unified Routing process in Dynamics 365.

Work Creation – Work item can be originated and ingested from Customers via any channel. This can be Voice, SMS Text, Social like Facebook or Twitter, Chat or Email. This work item gets created as a record in Microsoft Dynamics 365 and is part of the Channel Workstream in Microsoft Dynamics 365 Omnichannel for Customer Service. The following is a list of Channels that can be created.

Channels in Omnichannel for Customer Service

Work classification – The first step that Unified Routing does is to classify the work item. The classification can be based on the Customer category (Silver, Gold), Urgency (SLA), Skills required, Language etc. Machine Learning models can be created and applied to classify the work item (I will be writing about this in a future blog). Classification is an important task to be able to better understand the work item characteristics and assign to the specific queue that match the same.

Work Assignment – Once the work is classified the next step is to assign the work to the right Queue and Agent within the Queue. During the assignment stage, the work items are assigned to the appropriate queue. You may have separate queue based on the Customer category (Silver/ Gold) or the type of work (Request for information, transaction issue, returns) etc.

Once the items is assigned to a Queue the item is prioritized. This makes sure that the Agents are assigned the high priority item first. Then the work item is assigned to the agents based on the work characteristics, agent skills and capability, and the current state of the agent workforce in terms of availability and workload.

The benefits of using Unified Routing are

1. Matching Customers with the right Agents for first time resolution

2. Classification of work items using Machine learning models

3. Work item prioritization within a queue

4. Work item assignments based on Agent capacity, presence and skills


The Unified Routing process helps in managing Customer Service workload for the organization. There are many set-up and configuration requirements to ensure that the Unified Routing works and is configured for the business process as applicable for the organization.

I will write more about configuring and enabling Unified Routing for Microsoft Dynamics 365 Omnichannel for Customer Service in my future blogs. Thank you for reading.

Mihir Shah I @mihircrm I 365WithoutCode


Tuesday, June 28, 2022

Send Survey from Dynamics 365 apps using Customer Voice

Feedback is a gift and managing feedback from customers / vendors / employees is crucial for every organization. I have written earlier about measuring customer experience. This blog is about the new enhancement to Dynamics 365 Customer Voice. Now you can send a Survey directly from Dynamics 365 apps like Sales or Customer Service.

About Customer Voice - Dynamics 365 Customer Voice is an Enterprise Feedback Management app. The app enables you to create, distribute and gather real time survey feedback from your customers and generate insights with metrics. The insights from your customers can help you to transform your products, service and business processes.

Dynamics 365 Customer Voice


D365 Customer Voice app is used to design and distribute the survey. You can send the survey in multiple ways as shown below. The limitation was you could not send the survey from within D365 apps earlier.

Multiple ways to distribute survey

Now you can send a survey directly from within Dynamics 365 Apps like Customer Service, Sales or Marketing. As shown below you can send a survey to a lead from Sales Hub.

Send survey from D365 Sales app

Below are the steps you can take to send a survey from D365 model driven apps.

1. Enable and set-up D365 Customer Voice in your D365 Tenant. 

2. Create the Project and link it to your D365 Dataverse environment. 

3. Create your Survey using Customer Voice

If you want more details for the above 3 steps please refer my earlier blogs here - Set-up Customer Voice. I will write in details about the further steps below.

4. Install the Send Survey solution 

Microsoft has provided a free app on Microsoft appsource that you can install in your D365 dataverse environment. 

Send Survey app
You will have to accept the terms of the app.

Check that the solution is installed at make.powerapps.com > solutions


Publish all customization.

5. Now you should see the Send Survey button on a lead or a case form. You can also see it on a Contact record.


6. Once you click on the Send Survey button you will get to choose the Survey you want to send. This is based on the Survey you created or someone shared it with you in Customer Voice.


7. Once you choose the Survey and click next, you will get to select the email template and locale


8. The survey invite link email will be received by the recipient. The survey invite will also be shown on the Contact timeline.

Note - The Sender is the 'user name' who sent the email and Microsoft default email address. You can change the sender email if needed. That will require some work on the org settings in Microsoft 365. (more details here)

Change the sender's email address

9. Once the recipient completes the Survey the survey response will be shown in the Contact timeline.


I hope this helps you to get started using the Send Survey option from Dynamics 365. Please let me know how you like the new functionality and your experience with Customer Voice.

Thanks for reading.

Mihir Shah | @mihircrm | 365WithoutCode


Sunday, May 29, 2022

Let your data talk for you - Interactive Power BI in Power Point

One of the new feature released during the Microsoft Build 2022 session is to have interactive Power BI report pages (or tiles) in Power Point. This enables users to play with and better understand the story from the visuals in Power Point. Here is how easy it is using Microsoft 365 and Power BI - 

1. In Power Point select a new page and select Insert  >  Add-In  - Search for Power BI and select Power BI Tiles or Microsoft Power BI (to add report pages)

Insert Power BI Add-in

2. Copy the url of the Power BI Report page and paste it in the box on the Power Point page and hit insert.


3. Once the Power BI account is done you can see the report page in your Power Point. This has all the functionality as in Power BI you can filter / slice the data in Power Point. 

Play with your data in Power Point

4. There is also a Power BI toolbar at the bottom which allows you to perform certain Power BI functions directly from Power Point. The Data Options from the toolbar is shown below -

Data Options

Add Filters / Insights


5. Now if you want to share this power point with other users they need to also be shared the dataset and have the Power BI active account. The other option is to share it as an static image if the user does not need to play with the data.

Hope this gets you started with showing your Power BI reports and tiles in Power Point.  Thanks for reading.

@mihircrm
365WithoutCode


Friday, April 29, 2022

AI and Power Platform - Part -2 - AI Builder

 This is a continuation of my series on AI with Power Platform. Part-1 was on AI with(in) Power BI and this blog is about AI Builder.  As Apps are getting created for every possible business scenario there is also a demand for infusing AI in your Enterprise Apps. 

    Within the Microsoft Power Platform the easiest way to add AI to your Power Apps is by using AI Builder. AI Builder works with Power Automate and can instantly enhance your application by adding AI processing capabilities with your data. You can also choose to add AI capabilities using Azure AI, but if you are using Power Platform - a Low Code Platform App why not use AI Builder.

One of the main reason why you may want to use AI in your Apps is because today AI is a necessity not a luxury -  (Microsoft blog).  I am not saying every App needs AI, but it makes a big difference when you add AI capabilities within your Apps.

So how to get started with AI using AI Builder? It is very easy. Select AI Builder from PowerAutomate.com and get your first AI builder model created. Here are some things you may want to consider. 

AI Builder in Power Automate

1. Know the Business scenario that your App serves - Does you app process Customer application? Does it to Accounts Payable - Invoice processing? Is your app collecting Customer feedback? Based on that you can select the AI Model. 

Fig-1 Business Scenario


2. AI Model - Currently there are 17 AI builder model type and the list is growing every few months. It is important to select the right model type based on your business scenario. They range from forms processing, Prediction, Sentiment Analysis to Text Recognition. Every model is focused on one particular aspect of Business scenario. 

There are basically 2 types of model Builds and it is important to understand the differences between the same. 

Model Build

Pre-Built Model

Custom Model

Application

Generic Use Case found common across Businesses and Industries

Custom – For your specific Business Use Case

Customizable

No

Yes

# of models

11 Pre-built models

6 Custom Models

Training needed?

No

Yes


3. Collect the needed Data - Every model needs certain type of Data as Input to the model. The correct Data type has to be identified. You have to be diligent in knowing all possible variations and collect enough samples of each variation needed for the Custom model to be trained. There are 4 main data types as shown below. 


When collecting the Data for training the model it is important and necessary to understand the following 2 AI Integrity concepts to build a Trusted AI model. 

3.1    Bias - Bias in AI occurs when model gives a preferential treatment to certain privileged groups. AI models can become biased and that can have serious business implications. This can be because of the data that was used to train the model was not an accurate sample or had introduced the bias. So it is important to test the data and results of AI for any bias. (Refer IBM Blog)

3.2 Drift -  Drift can occur when AI models are faced with a different sets of data than what they were trained with. This can degrade the accuracy of the AI Model over time. (Refer IBM Blog)

 4. Train the Model - Every Custom model needs to be trained. Training is the critical part of AI Builder and if you do it wrong you will regret later. This reminds me of the movie - How To Train Your Dragon which can pretty much sum up as what to expect when you do not care for training your Model (Dragon). As you are training the model check for any possible Bias or Drift scenarios.

Train your AI Model

Training the model can take time based on the variation in the type of data. There is also a minimum # of sample data that may be required and recommended for training the model.

Train model

5. Manage the Model - Once the model is trained you need to manage and maintain it. AI Builder provides a snapshot of the model accuracy and confidence. If there is a degradation on the accuracy you may want to re-train the model with a fresh dataset. Make sure to test the model after every training.

Model performance

6. Deploy the AI model -  You will need to publish the model than you can use with Power Automate or Power Apps

6.1 Power Automate - You can use the model in a Power Automate flow. For example a Forms processing model can be referenced in the flow and the data can be extracted from the model and send for example via email. 

Extract data from invoice and send email

6.2 Power Apps - You can use AI Builder in 2 ways with Power Apps - 

        1. Use AI model in the Formula Bar - Example adding the Sentiment analyzed from a Text 

        2. Add AI Builder components to the App 

Add components

Things to note - 

1. AI Builder model is solution aware and can be added to the solutions. This is great for ALM.

2. Data Loss Prevention (DLP) rules also apply to AI Builder.

3. You can also do "Bring your own AI model" using Azure Machine Learning (AML) models.

Hope this helps you to get started with AI Builder and automate your tasks or generate insights. With a easy to build, low code application platform there is no reason why your App cannot have AI built in it. 

Let me know your experience in using AI Builder in your app and thanks for reading.

@MihirCRM

365WithoutCode


Thursday, March 31, 2022

AI and Power Platform Part-1 - AI with Power BI

 AI has become ubiquitously exploding and seems like every business application is now infused with it. This is also the case with many of the Microsoft business apps - Dynamics 365 and Power Platform. In this blog series I will explore the infusion of AI in the Microsoft Power Platform and business outcome benefits from it. To start this blog is about AI with(in) Power BI. 

There are many wonderful reasons to use Power BI -

1.    It is now the 'defacto' visualization tool for data with Microsoft

2.     Analytics using Power BI is easy to learn 

3.     It has built in AI capabilities that can be used without writing any code.

If you were not aware of the #3 above than now is the time to explore some of the AI capabilities. 

Power BI has many AI and AI related capabilities OOTB as detailed below -

1. Key Influencers - Provides impact and influence of key contributors on the result.

Key Influencers

The above report helps to answer Sales questions such as - What is the biggest influencer for an opportunity to be won? (or Lost) (discount as in this case and you may not need AI for that). The point is that we now have the power to quickly identify the key influencers on a particular business results. There is no more detailed modeling or manipulation of data needed and helps in understanding patterns and taking actions based on the key influencers.

2. Decomposition Tree - ability to quickly do a root cause and ad-hoc analysis using AI Splits.

Decomposition Tree

In this case we can drill down from Sales to a hierarchy of Sales by Category - by Product - by Region. The AI here is where to drill down using AI Splits to get to the next highest or lowest value. For example below shows that David So has the highest Opportunity values path.

AI Splits - Highest Opportunity value

This can be useful in identifying the biggest opportunity owner from an ocean of Sales data and making sure that the business results are met.
 

3. Anomaly detection - Auto detect anomalies in data and generate dynamic text summaries. Identifying anomalies in data may not be new but auto generating a paragraph that explains the anomaly can be very useful. It can also provide answers to specific questions. Lets look at the revenue line chart where there is a sharp decline in revenue. 


Anomaly detection

I can select the lowest point and right click > analyze > explain the decrease and Power BI shows me various possible reasons to identify the anomaly.

Analysis results

So now I know all the possible reasons there was a decrease in revenue in plain English. (If only it could tell me who is blank 😀 )

Additionally there are many other AI options like Q&A and Insights which provide great benefits to users.

You can add the AI insights to a report page using the Insert > AI visuals option or pick the AI visuals from the Visualizations pane.


I hope this helps in getting you started using AI in Power BI and let me know about your experience.

I will write more about AI in Power Platform in my future blogs. Thanks for reading.

@mihircrm

365WithoutCode


Monday, February 28, 2022

Industry Cloud solutions using Dynamics 365 and Power Platform

As Cloud applications are now the global standard, there is a demand for building vertical industry specific cloud solutions that provide pre-built insights and intelligence, business processes and relevant experiences for the industry. Microsoft has introduced multiple Industry Cloud with Dynamics 365 solutions. This blog is to introduce the Industry Clouds solutions from Microsoft built on the Microsoft Dynamics 365 and Microsoft Power Platform.

Currently there are 4 Industry Cloud solutions available and I am sure Microsoft is working on few more in the pipeline. They are as below.

  • Microsoft Cloud for Financial Services
  • Microsoft Cloud for Healthcare
  • Microsoft Cloud for Retail
  • Microsoft Cloud for Nonprofit

Each Industry Cloud has the following - 

1. Industry specific functionality - For example the Financial Services Cloud consists of the following -

A unified Customer Profile (Customer 360) app, Customer Onboarding app, Loan Management app  Customer Engagement app etc.. The Industry apps provide tailored experiences for both the users and Customers. They help in better collaboration and decision making.

Microsoft Cloud for Financial Services 


2.  Each Industry Cloud includes specific components - Solutions, Apps, Templates and Services. It also includes data model built for the Industry Cloud. The data model can also be installed as a stand alone solution. For example The Retail Banking data model.

3. A Compliance program for Microsoft Cloud which enables the Clients to measure and control Risks and manage Industry compliance. This also includes specific architectural templates to help in designing and deploying Microsoft Cloud solutions for the specific Industry. An example for Financial Services Cloud Architectural template is shown below.


There is certain requirements that needs to be followed.

1. You need to have the specific licenses before you can deploy the Industry Clouds. 

2. There are pre-requisite that needs to be completed and after the Industry Cloud solutions are deployed there are also post deployment steps to be followed. 

3. Pricing - Each industry Cloud has a specific pricing template. The price for Financial Services Industry Cloud is approx $20k per Tenant. If you have 1000+ users this is a very reasonable (imho) price for the OOTB functionalities that the Industry Cloud provides.

Pricing for Financial Services Cloud

I would recommend to first do an internal analysis on the business processes and perform a proof of concept testing of the Industry Cloud solution. 

The Microsoft Industry Cloud are great examples of how to best utilize Microsoft cloud apps for your specific Industry. They come pre-built with the data model, AI apps and solutions that you can easily test and deploy. I am certain this will help accelerate your cloud transformation journey. 

In my future blogs I will explore some of the Industry Clouds and write more about it. Thank you for reading and let me know about your experience with the Microsoft Industry Cloud.

@mihircrm

365WithoutCode